

WheelTopの電動コンポーネント「EDS」の特徴、スペックまとめ
中国メーカーWheelTopが新しくリリースした格安電動コンポーネント「EDS」についてスペックや特徴をまとめました。
最終更新日: 2023/12/26
公開日: 2022/04/26
ロードバイク・MTBなどで使われるシーラントとは何か、そのメリットとデメリット、シーラントの選び方、どれくらい入れれば良いのか、いつ追加・補充すればいいのかなど、シーラントの使い方ガイドをガイドします。
この記事の目次
スポンサーリンク
Sealants used in road bikes and MTBs are special liquid compounds that are inserted into the tire or tube for the following purposes:
Thanks to their unique properties, sealants can fill even sub-millimeter gaps between the rim and the tire, preventing slow leaks.
Moreover, sealants are also effective for temporarily sealing punctures. When a puncture occurs, the escaping air pushes the sealant toward the hole, where it coagulates and seals the leak.
Bicycle tires are generally classified into the following four types:
Let’s look at how sealant is used with each type:
| Tire Type | Prevents Air Leakage | Temporary Puncture Repair |
|---|---|---|
| Clincher (tubed) | - | - |
| Tubular | - | ○ |
| Tubeless | - | ○ |
| Tubeless Ready | ○ | ○ |
Sealants are mainly used for temporary puncture repair in all tire types except for clinchers. However, when it comes to preventing air leakage, only tubeless-ready tires require sealant.
Most of the tubeless-compatible tires and wheels currently available on the market are of the tubeless-ready type, which means they require sealant to maintain air pressure. Without sealant, air leaks through the microscopic gaps between the tire and the rim.
While it’s possible to use sealant in clincher tires (by injecting it into the tube), it’s generally not recommended due to the added weight. In most cases, replacing the tube is a simpler and lighter solution.
There are several types of sealants for tubeless tires, but they can generally be categorized into the following two types:
In addition, some products include solid particles to help seal larger punctures more effectively.
Here are the characteristics—both advantages and disadvantages—of each type:
| Sealant Type | Advantages | Disadvantages |
|---|---|---|
| Latex-based Sealants | Quickly seals holes Lightweight |
Dries out quickly, requiring frequent refills |
| Rubber-based Sealants | More resistant to drying Long-lasting effect |
Slightly heavier |
Product prices vary as well, so it’s best to consider your budget along with the pros and cons of each type when choosing a sealant.
Sealant serves to fill small gaps, so if a tire is punctured, it can seal small holes. While it doesn’t completely repair a puncture, a well-sealed tire can resist losing air even when punctured multiple times by nails.
For example, Black Ox, a sealant manufacturer, has even posted a video showing a sealant-filled MTB tire being shot with a rifle without going flat.
Tubular tires, which are popular in road racing, integrate the tube and tire into a single unit. This means a puncture usually requires a complete tire replacement. If you puncture multiple times during a ride, you might run out of spare tires. By contrast, using sealant in tubeless tires allows the sealant to fill holes and keep you riding for a while.
Although it may not be suitable for continuing a long ride, you can likely make it home or to the nearest station. Some riders even carry sealant and a pump to re-inflate the tire and continue their ride after a puncture.
There is little difference between sealant used for tubular and tubeless tires—mainly viscosity.
This means that if you’re currently using tubular tires, the same sealant can likely be reused later when switching to a tubeless-ready setup. Since sealant only costs about ¥300–600 per tire, any leftover can still be used.
If you ride multiple bikes—for example, a tubular road bike for racing and a tubeless-ready gravel bike for leisure—you can standardize your puncture protection and reduce what you carry by using the same sealant for both.
For experienced riders or professionals, using sealant isn’t an issue. However, beginners may struggle with application and end up making a mess—sometimes coating their entire room in sealant. This is especially likely if you try injecting sealant without fully deflating the tire first. That said, carefully following the manufacturer’s instructions can prevent most problems.
With tubeless-ready tires, if you get a flat while out riding, you’ll likely need to install a new tire and add more sealant on the spot. Handling an old, sealant-filled tire will definitely get your hands dirty, so it’s a good idea to carry rubber gloves in your repair kit.
You typically need about 30–60 ml of sealant per tire, which can add up to roughly 100 g for two tires. While that may not sound like much, every gram counts for cyclists aiming to reduce the weight of their road bike.
For sealant to work properly, it must be applied in sufficient quantities. Diluting it or using too little will reduce its effectiveness.
Sealant doesn’t last forever. Depending on the brand, it usually evaporates after 6 to 12 months. This means you’ll need to reapply it regularly to maintain effectiveness.
While tubular tires can still function without sealant, tubeless-ready tires rely on it to stay inflated. Without sealant, air will slowly leak out, so periodic maintenance is essential.
This is a disadvantage not shared by clincher tires, which can often last a year or more without attention—as long as you don’t get a puncture.
スポンサーリンク
The recommended amount of sealant varies depending on the brand. For example, Stan’s—the company credited with pioneering the tubeless-ready system—recommends the following:
These figures are general guidelines from the sealant manufacturer. In practice, narrow road bike tires can often hold air for a long time even with less than the recommended amount, while wider MTB tires may lose all air overnight if the quantity is too low.
Because of this, it’s a good idea to start with the lower end of the recommended amount—or even a bit less—and then leave the tire overnight. If air leakage occurs, add more sealant accordingly.
Sealant naturally dries out over time and does not remain effective indefinitely. Therefore, regular top-ups are necessary.
As a general rule of thumb, you should replenish sealant every six months. In some cases, particularly in hot or dry environments, you may need to add more every two months.
However, the actual lifespan of sealant inside your tire depends on several factors:
Some setups may last over six months, while others may dry up in just one month.
A simple way to check is by removing the wheel and shaking the tire. If you no longer hear the sloshing sound of liquid sealant and you’ve noticed increased air loss recently, it’s likely time to add more.
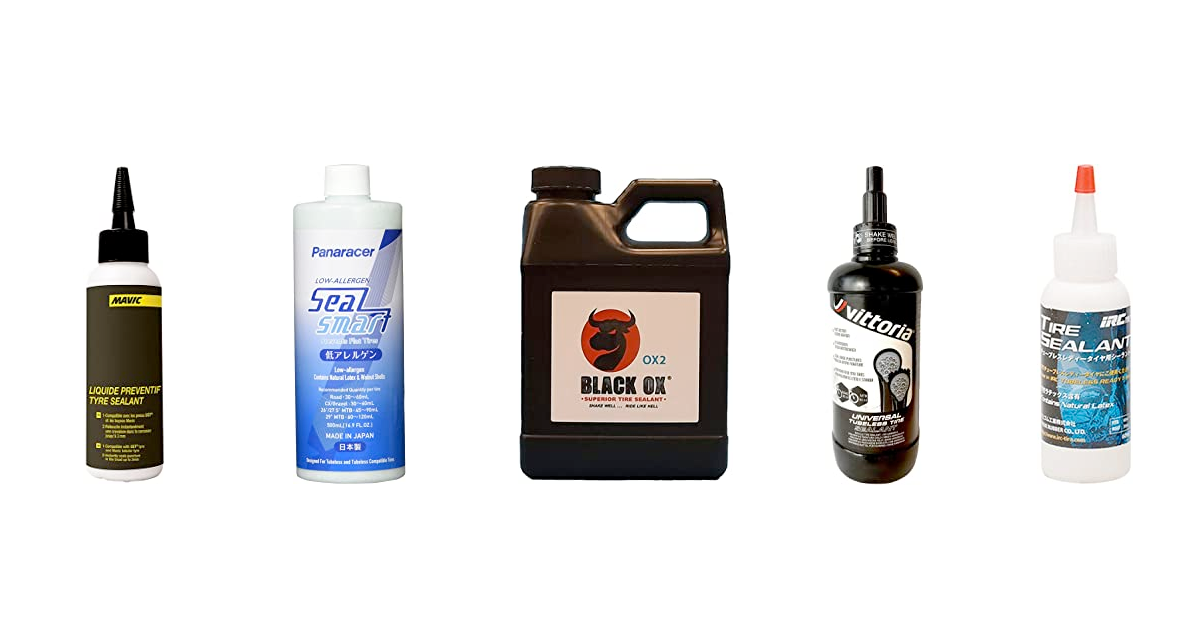
When selecting a sealant for road bikes or MTBs, it’s best to go with well-known products from dedicated bicycle component manufacturers.
Popular sealant brands include:
The best sealant for your setup may depend on compatibility, so there’s no one-size-fits-all answer. However, sealants from reputable brands tend to offer more reliability than those from lesser-known manufacturers.
In some cases—particularly with tubeless-ready tires and wheels—the wheel manufacturer may specify compatible tire and sealant brands.
While it’s not impossible to use non-specified products, the performance metrics claimed by the manufacturer are typically based on their recommended combinations. To ensure optimal performance and avoid potential compatibility issues, it’s best to use the sealant and tire specified by the wheel manufacturer.
スポンサーリンク
メリットしかない!自転車のタイヤの空気をしっかり入れることの重要性
意外と軽視しがちだけれども、実はメリットしかないのがタイヤの空気メンテナンス。今回は、タイヤの空気をしっかりいれておくことの重要性と空気を入れる時の注意点をまとめました。
タイヤが変われば走りが変わる!ロードバイクのタイヤの種類と楽しみ方
タイヤが変われば走りが変わる!ロードバイク向けのタイヤの種類とそれぞれの特徴やメリット・デメリット、タイヤを変えることでどのようにロードバイクの楽しみが出るのかをまとめました。
自転車のタイヤのサイズ・太さを変えるときの注意したい3つのポイント
数千円のコストで走り味がグッと変わって楽しいのがタイヤのカスタマイズ。タイヤを交換する際に、自転車のタイヤのサイズ・太さを変える時には注意すべきポイントが3つあります。
旧ETRTOと何が違う?新ETRTO規格の解説と選ぶ際のポイント
タイヤのサイズを選ぶ際の基準となっているのがETRTO規格。2020年に新しい規格が制定され、一部のタイヤでは新ETRTO規格での設計がスタートしています。今回は、旧ETRTO規格と新ETRTO規格の違いや、新ETRTO規格のタイヤを選ぶ際のポイントをまとめました。
25C?クリンチャー?知っておきたいロード向けタイヤの名称とサイズ・規格
一言にロードバイク向けのタイヤと言っても、サイズ規格やタイプなど様々な種類があります。今回は、ロードバイクのタイヤについて知っておきたいポイントをまとめました。
チューブレス、チューブレス・レディタイヤのメリット・デメリット
最新のホイールで採用がどんどん進んでいるチューブレス、チューブレス・レディタイヤ。チューブレスは何が良いのか?それぞれの違いやメリット・デメリット、クリンチャーとの運用やコスト面の違いをまとめました。
TPUチューブの特徴と、ロードバイク・MTBで使用するメリット・デメリット
自転車タイヤの第3勢力として注目されているのがTPUチューブ。その特徴と、ロードバイク・MTBで使用するメリット・デメリット、主なメーカーのTPUチューブをサイズごとに重量・価格でまとめて比較しました。
チューブレス、チューブレス・レディタイヤのメリット・デメリット
最新のホイールで採用がどんどん進んでいるチューブレス、チューブレス・レディタイヤ。チューブレスは何が良いのか?それぞれの違いやメリット・デメリット、クリンチャーとの運用やコスト面の違いをまとめました。
ロードバイク・MTBなどで使われるシーラントとは何か、そのメリットとデメリット、シーラントの選び方、どれくらい入れれば良いのか、いつ追加・補充すればいいのかなど、シーラントの使い方ガイドをガイドします。
ビードが上がらない!チューブレスタイヤのビードを上げる方法とコツ
チューブレスタイヤを使っている必須な作業が「ビードが上げ」。しかし、実際にやってみると簡単に上がる時もあれば、「頑張っても全然上がらない」ということもあります。今回は、上がらないチューブレスタイヤのビードをフロアポンプで上げる方法とコツを原因から考えて紹介します。
チューブレス、チューブレス・レディタイヤでパンクした時の修理方法
ここ数年で利用ユーザーが劇的に増えてきているチューブレスタイヤ。チューブレス、チューブレス・レディタイヤでも0には出来ないのがパンク。パンクの原因と修理方法をまとめました。
軽量No.1はどれ?ロードバイク用軽量チューブレスタイヤまとめ
ロードバイクでも利用者が増えているチューブレス。今回は、ロード用チューブレスタイヤはどれが一番軽いのか、サイズごとにチューブレスタイヤを比較しました。
チューブレスにあると心強い!タイヤブースター、ブースト機能付きエアポンプまとめ
チューブレスの導入の最難関でもあるビード上げを簡単にしてくれるのがタイヤブースター。1本あると心強いタイヤブースター、ブースト機能付きエアポンプをまとめました。
WheelTopの電動コンポーネント「EDS」の特徴、スペックまとめ
中国メーカーWheelTopが新しくリリースした格安電動コンポーネント「EDS」についてスペックや特徴をまとめました。
シマノの最新リアディレイラーに採用されている「シャドー・RD」とは何か?その特徴と、選ぶメリットを解説します。
【MTB・クロスバイク】フラットバー用・油圧ブレーキメーカー
MTB・クロスバイク用の「フラットバー用・油圧ブレーキ」を製造しているメーカーと、その特徴を解説。フラットバー用・油圧ブレーキメーカーの選び方も。
シマノのロードバイク、MTB、クロスバイク用コンポーネントで採用されているチェーンの互換性を解説。チェーンの選び方について解説します。
シマノから新しくリリースされた8速コンポーネント「ESSA」のラインアップと、既存8速パーツとの互換性を解説します。
SRAMのロードバイク、MTB向けスプロケットの互換性を解説。互換するドライブトレイン、ホイールを見つけることができます。
SRAMのMTB向けコンポーネントの互換性について解説。互換性があるパーツの組み合わせ、組み合わせることができないコンポーネントをまとめました。
それぞれ別コンポーネントの互換システムにある、ロード用スプロケットとMTB用スプロケットは組み合わせて使うことができるのかを解説します。
シマノDi2コンポーネントを接続するのに必須な専用工具「プラグツール」の種類と、各Di2パーツとの互換性について解説します。
シマノ・CUESシリーズのスプロケットの互換性を詳しく解説。スプロケットと互換が発生する、リアディレイラー、チェーン、ホイールの互換性を一覧で確認できます。
シマノの油圧ブレーキ用ホース・コネクティングボルトの規格と選び方
シマノの油圧ブレーキ専用ホース「BH90」と「BH59」の違いやコネクティングボルトの種類、自分のブレーキに合う油圧ブレーキ・ホースの選び方、選ぶ際の注意点を解説します。
【メーカー別】油圧ブレーキのオイル種類と特徴、メリット・デメリット
自転車の油圧ブレーキで使われる油圧オイルの種類とそれぞれの特徴、メーカーごとのブレーキオイルの種類を解説します。
シマノ・Di2システムの根幹であり、システム全体のレイアウトにも影響を与えるDi2 バッテリー。種類と互換性について解説します。
シマノ・Di2コンポーネントのエレクトリックワイヤーの種類と、Di2コンポーネントとの互換性をまとめました。
シマノの電動変速システム「Di2」コンポーネントの世代の見分け方
シマノの電動変速システム「Di2」コンポーネントの互換性が発生する世代分けについて解説。各シリーズのコンポセットがどの世代になるのかを一覧でまとめました。
11速までと大きく変わった、シマノの12速スプロケットを使う上で重要な「取り付けるホイール(フリーハブ)」と「ドライブトレイン」の二つの互換性について解説します。
シマノの11速スプロケットを使う上で重要な「取り付けるホイール(フリーハブ)」と「ドライブトレイン」の二つの互換性について解説します。
シマノの10速スプロケットを使う上で重要な「取り付けるホイール(フリーハブ)」と「ドライブトレイン」の二つの互換性について解説します。
シマノの9速スプロケットを使う上で重要な「取り付けるホイール(フリーハブ)」と「ドライブトレイン」の二つの互換性について解説します。
MTBの「ブースト(BOOST)クランク」とは?従来のクランクとの違いと選び方
MTBの「ブースト(BOOST)クランク」とは?従来のクランクとの違い、メーカーごとのラインアップと選び方を解説します。